Set up your first campaign
- Open up Drippi.ai and login
-
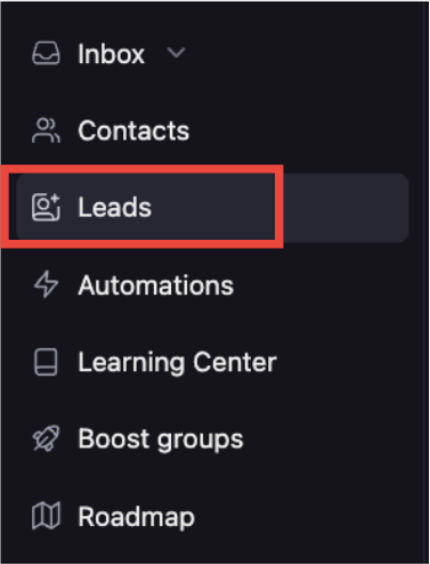
Go to Leads on the menu on the left side of the screen:
-
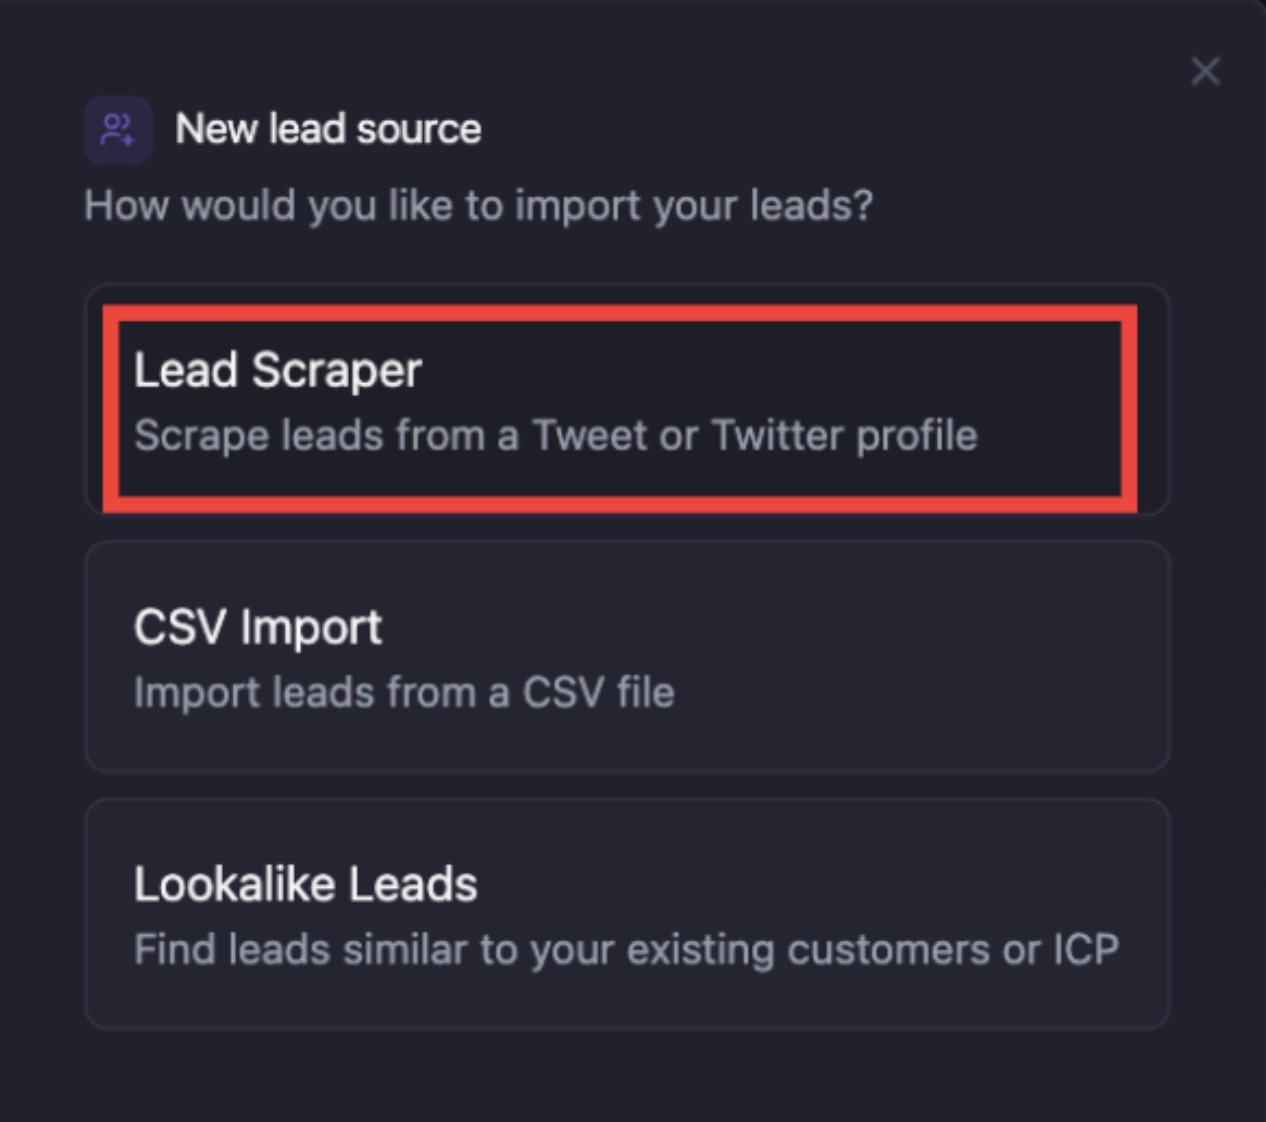
Select + New Lead Source:
-
Select Lead Scraper:
-
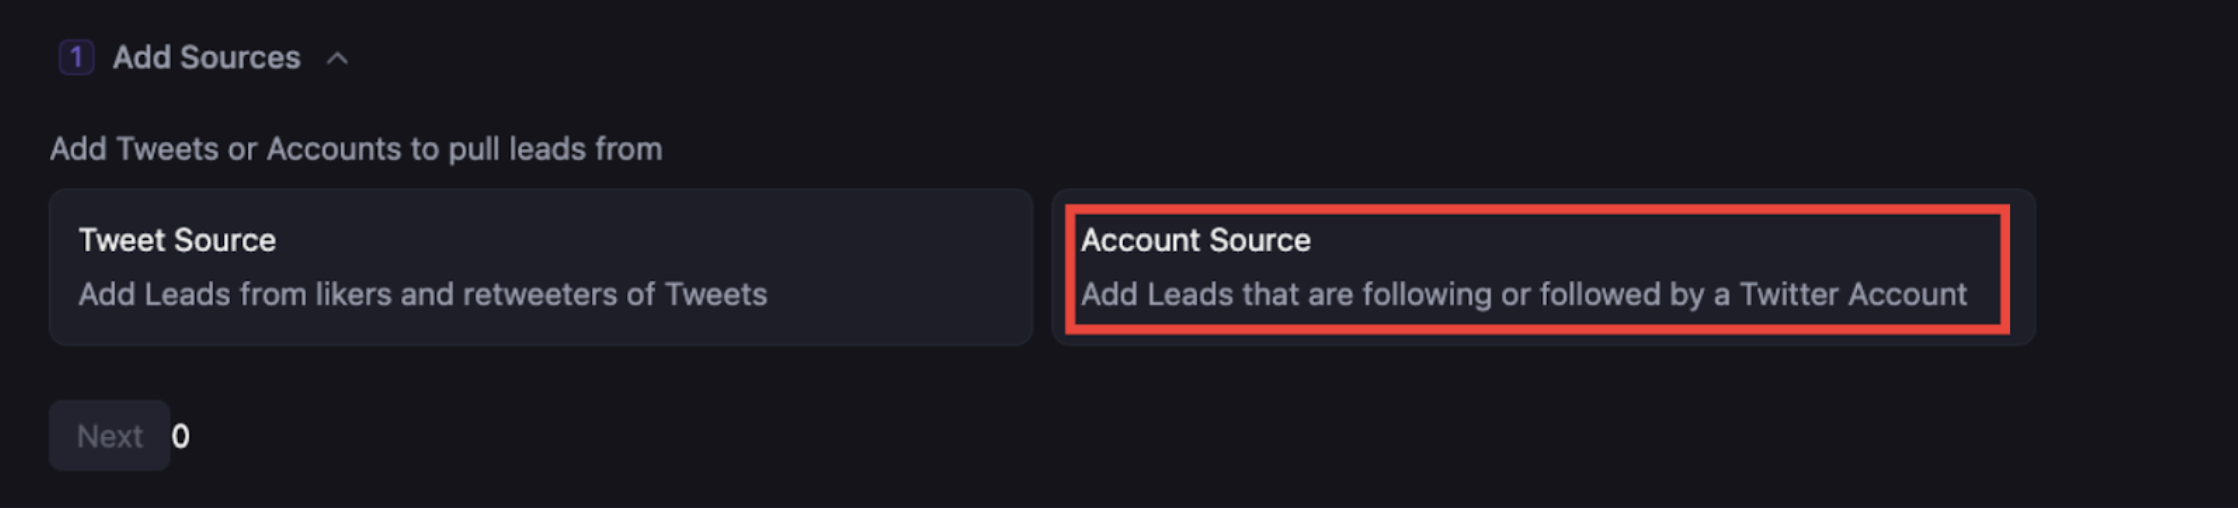
Select account or tweet source:
-
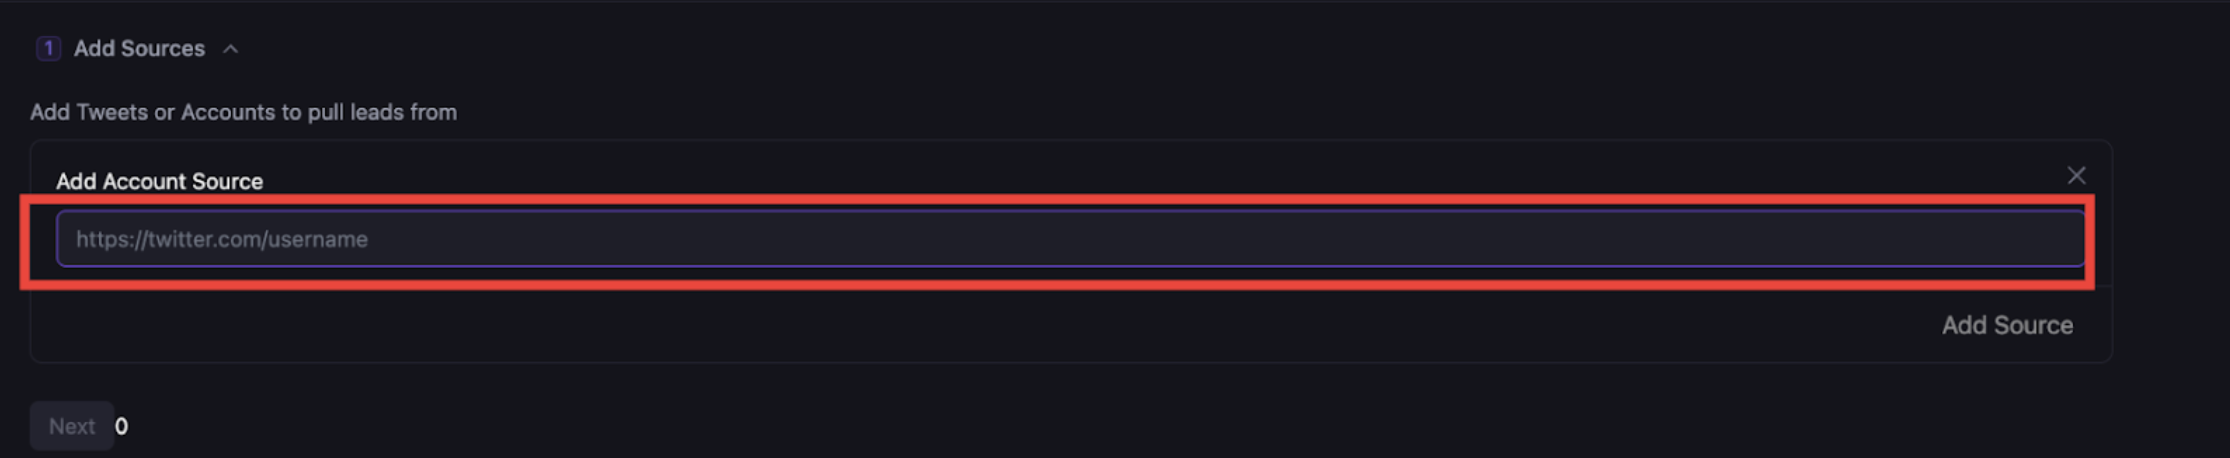
Paste the first lead source into the link space provided and wait for the profile to load:
-
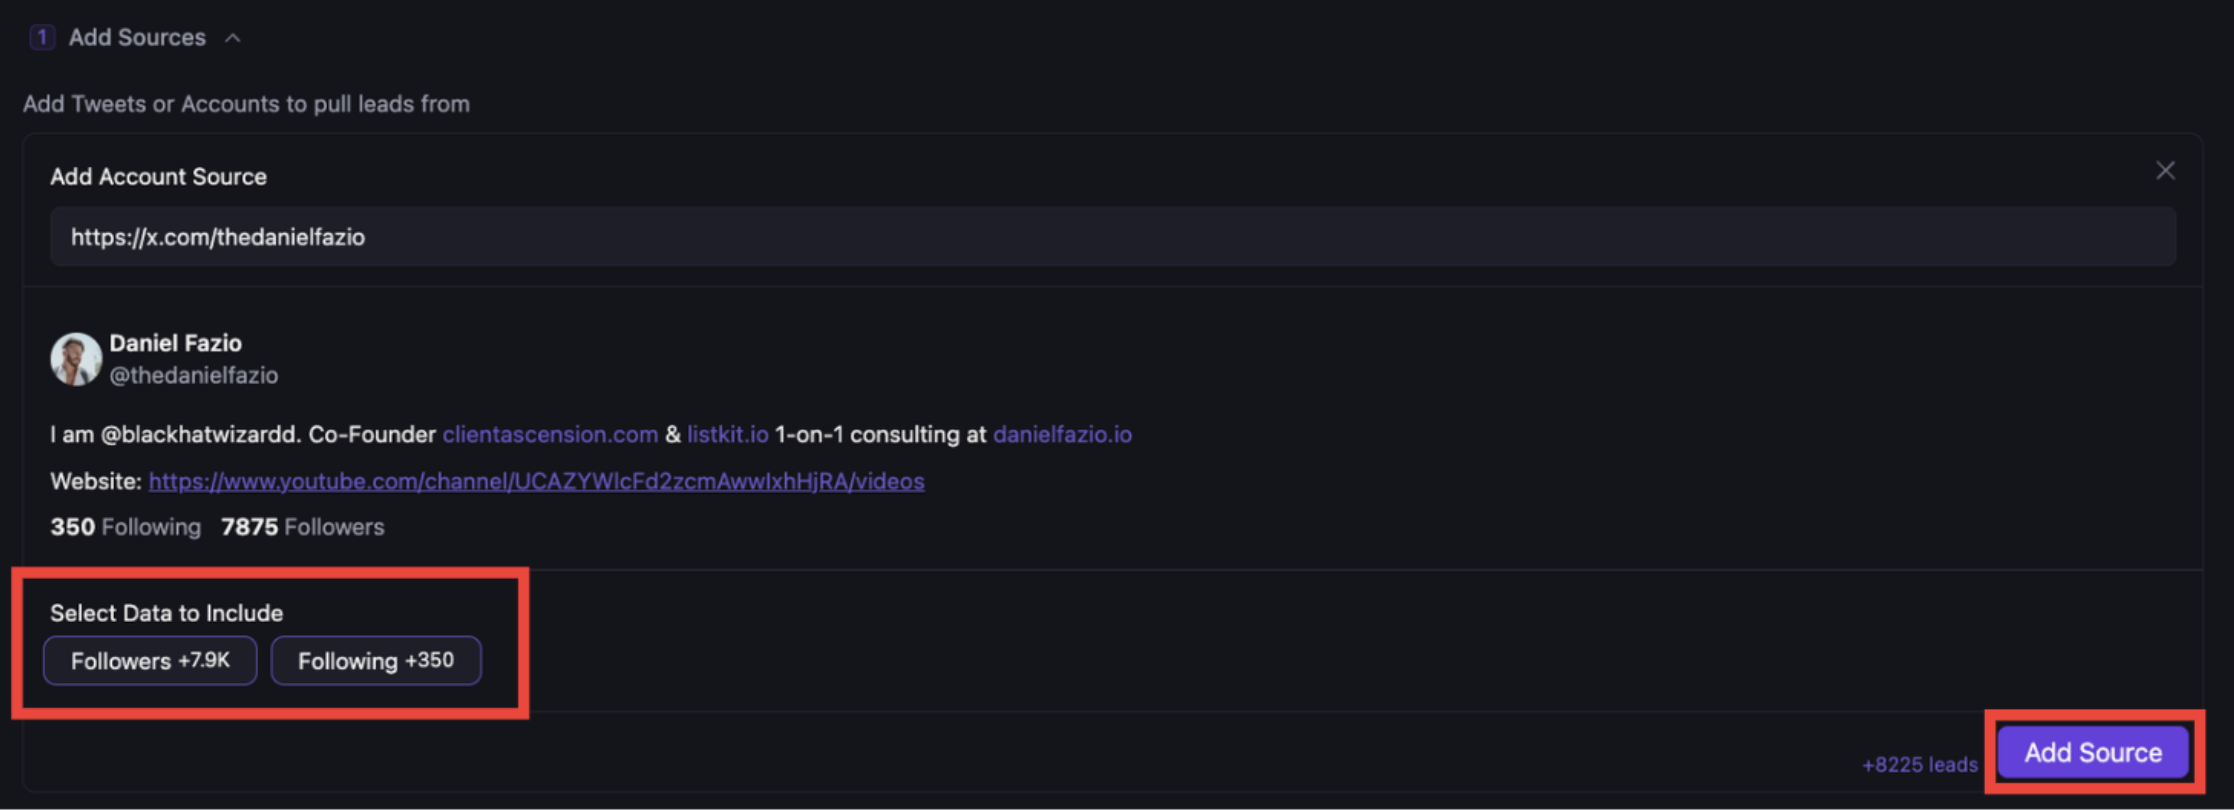
Select followers and/or following (depending on campaign) and hit add source on the bottom right hand corner
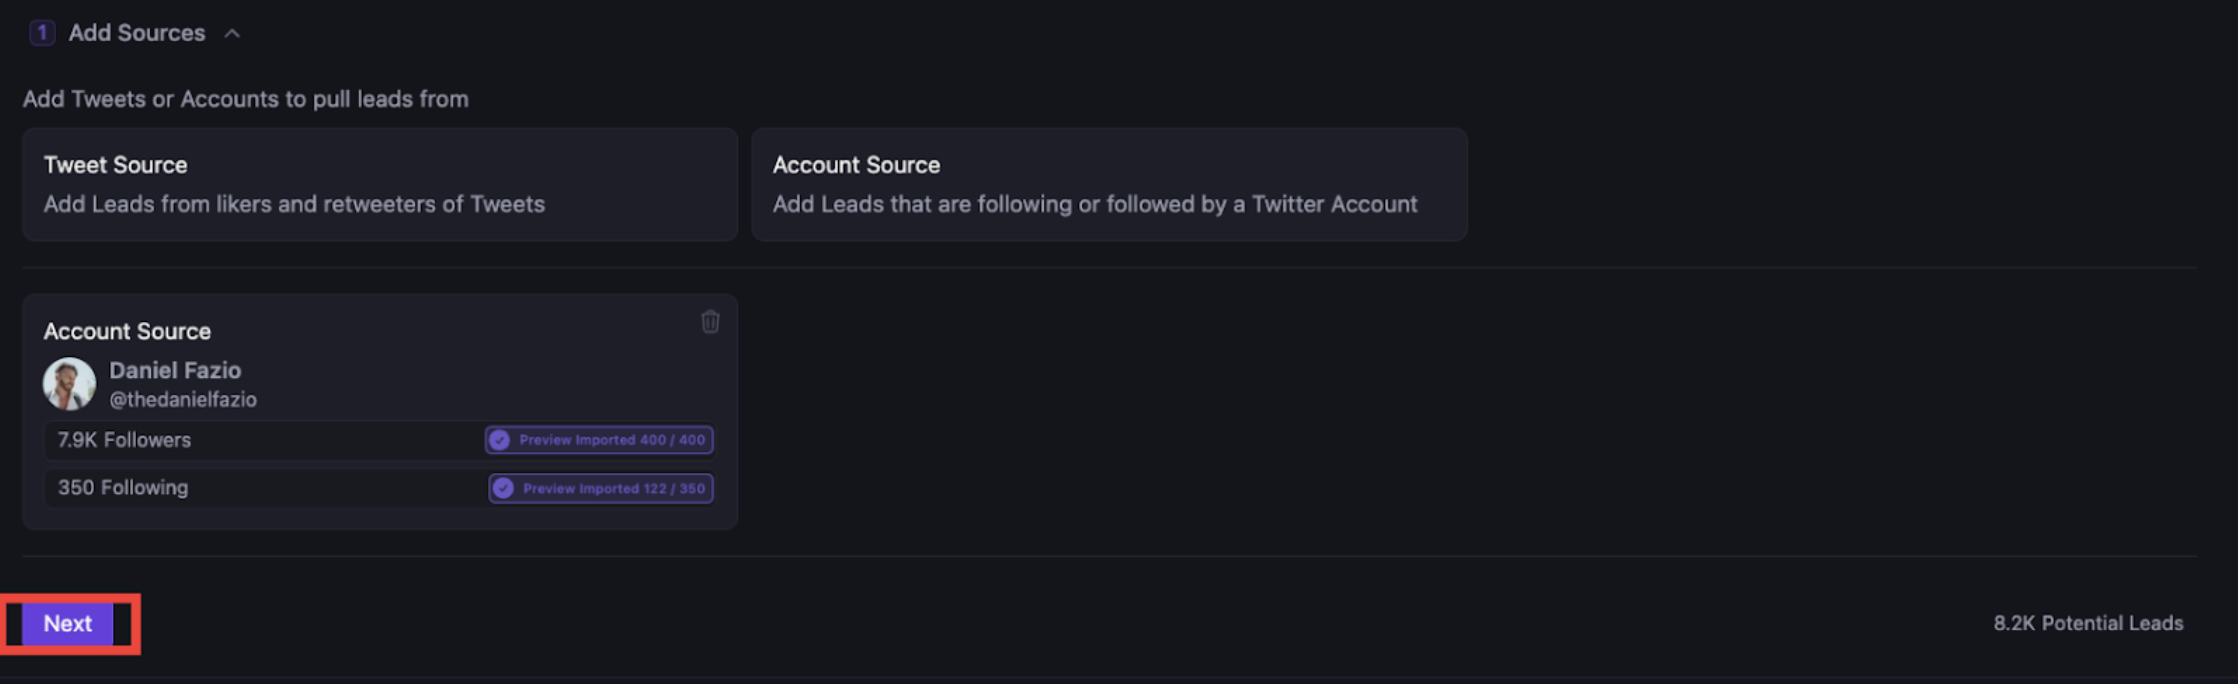
- Add more sources by repeating steps 7, 8, and 9 until the lead size is enough to where you think AFTER filters the campaign will have AT LEAST 20,000 leads
-
Hit Next:
-
Select Bio Contents
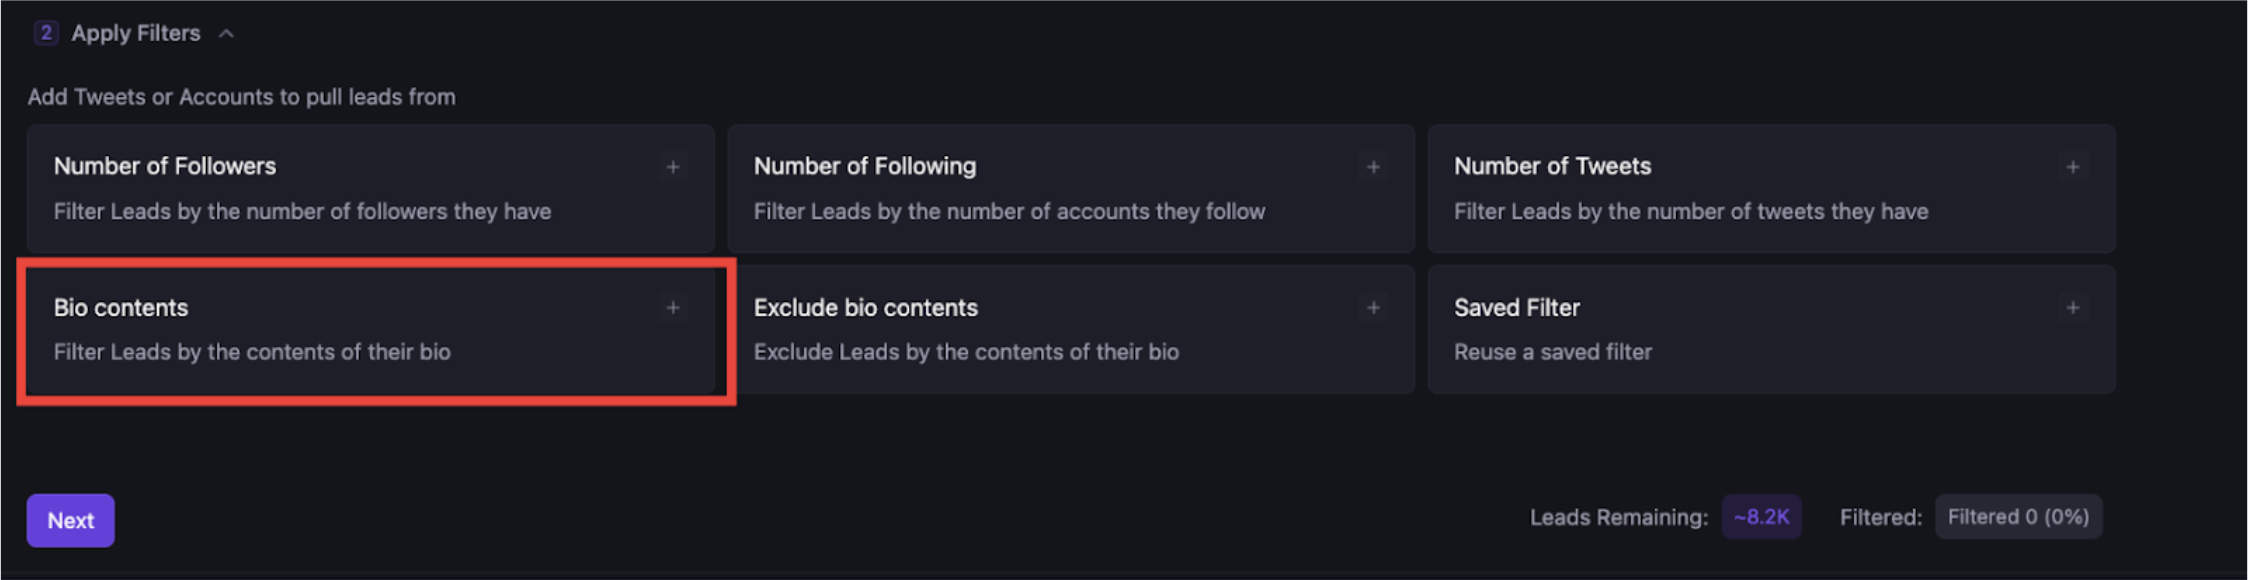
-
Hit add element and then hit Quick Add
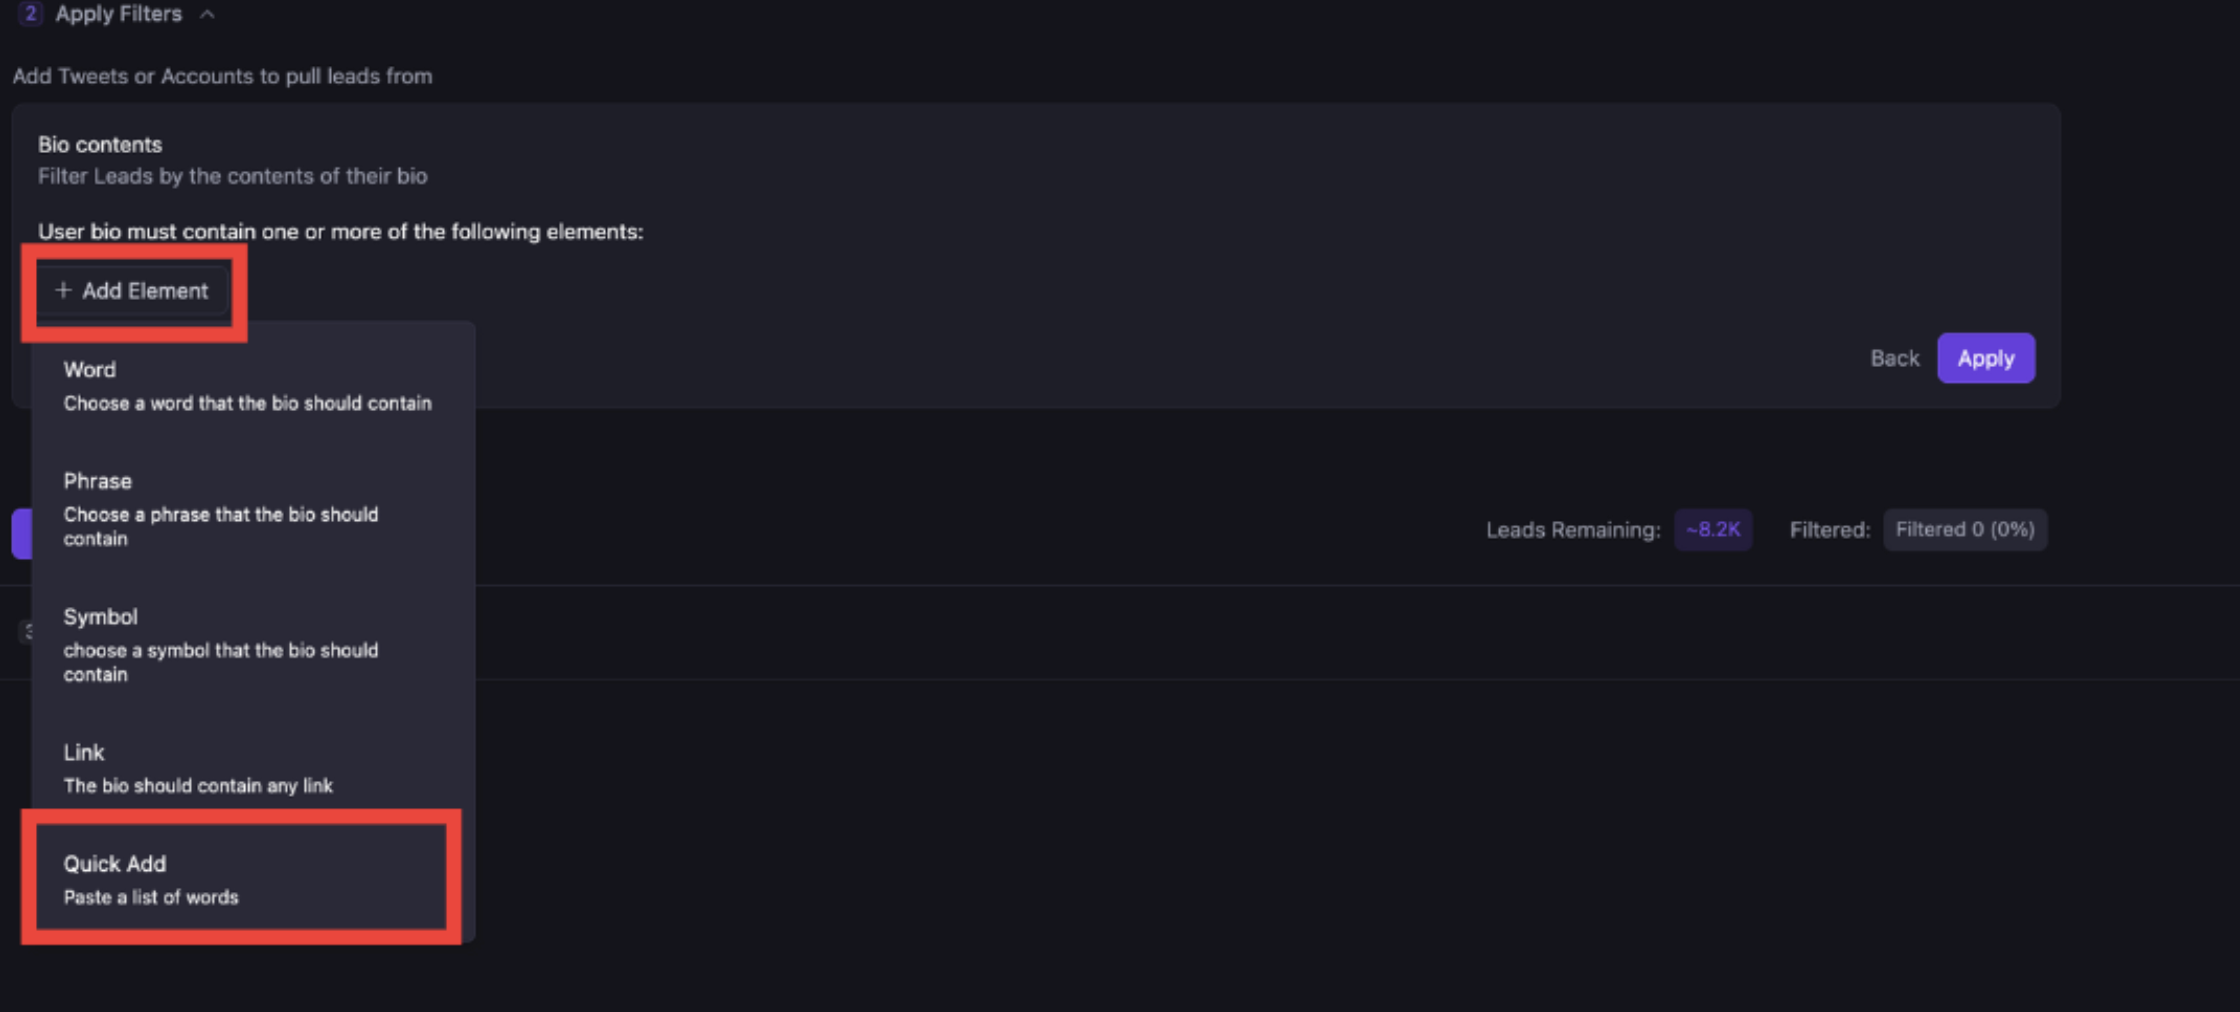
- Watch this video for the quick add feature: https://www.loom.com/share/e0c0b7ac04dc40caae626d8fc0043d9f
- After you’ve got your keywords, repeat the process for negative keywords
- Add a number of followers filter (if applicable)
-
Check how many leads are remaining
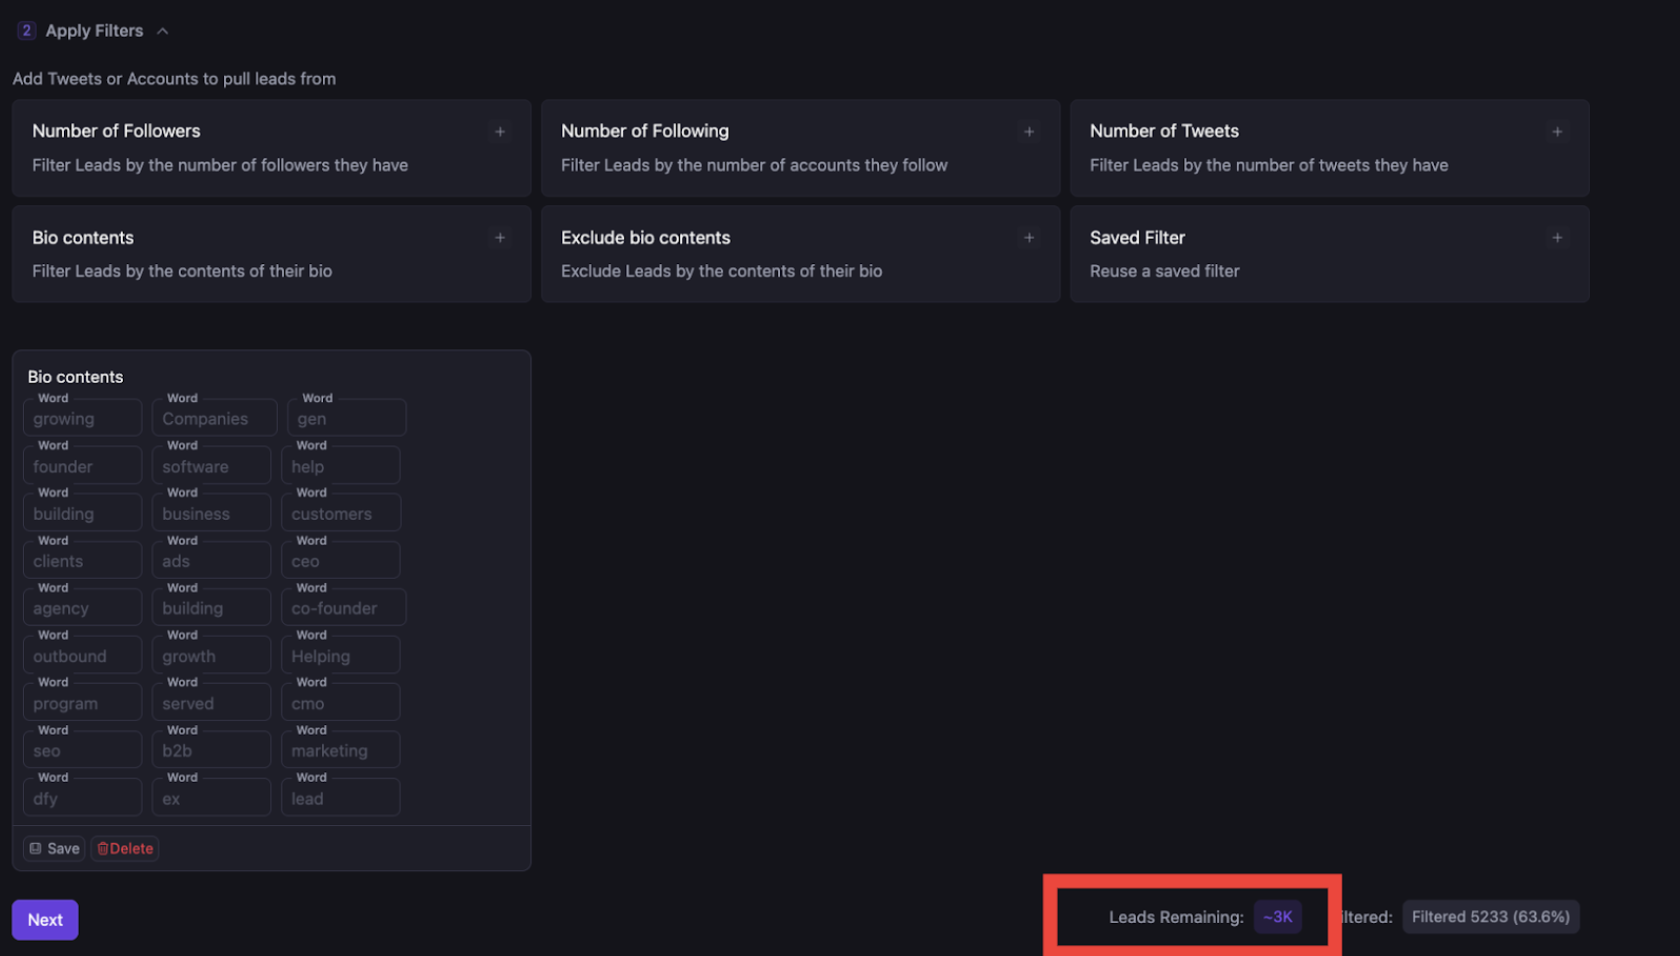
- If it’s LESS than 20,000 then go back to step 7 and add more lead sources.
-
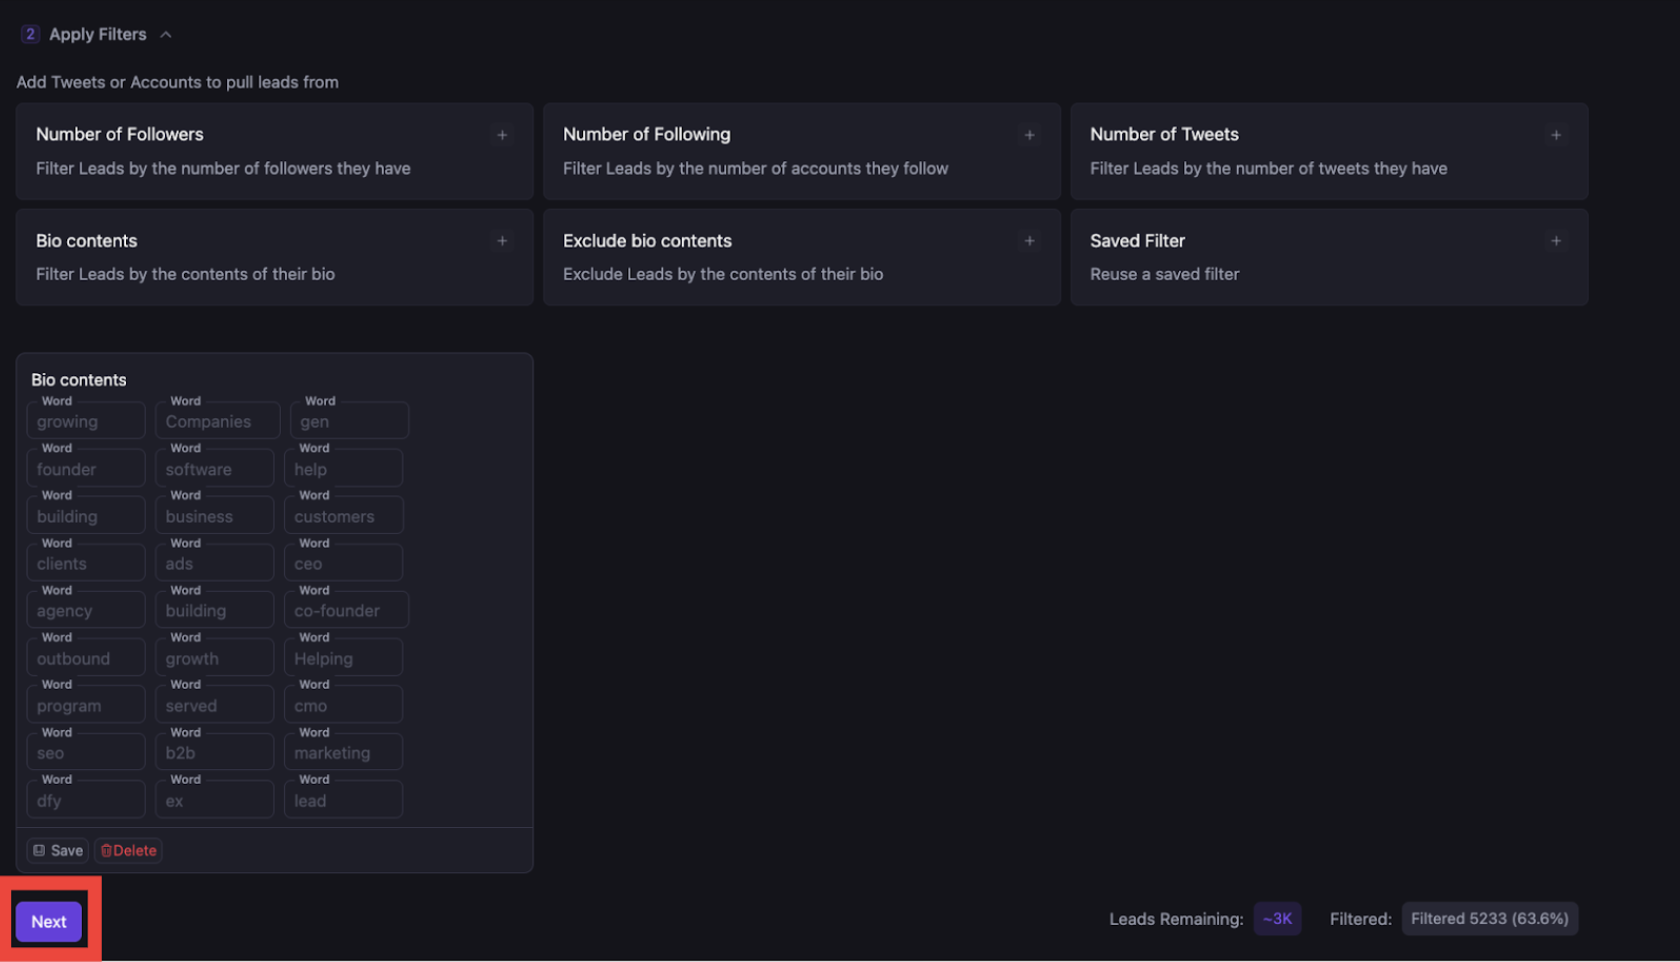
Once you’ve got over 20,000, hit NEXT
-
Name the lead source in the following manner: CLIENT NAME <> DATE <> SCRIPT <> ACCOUNT NAME
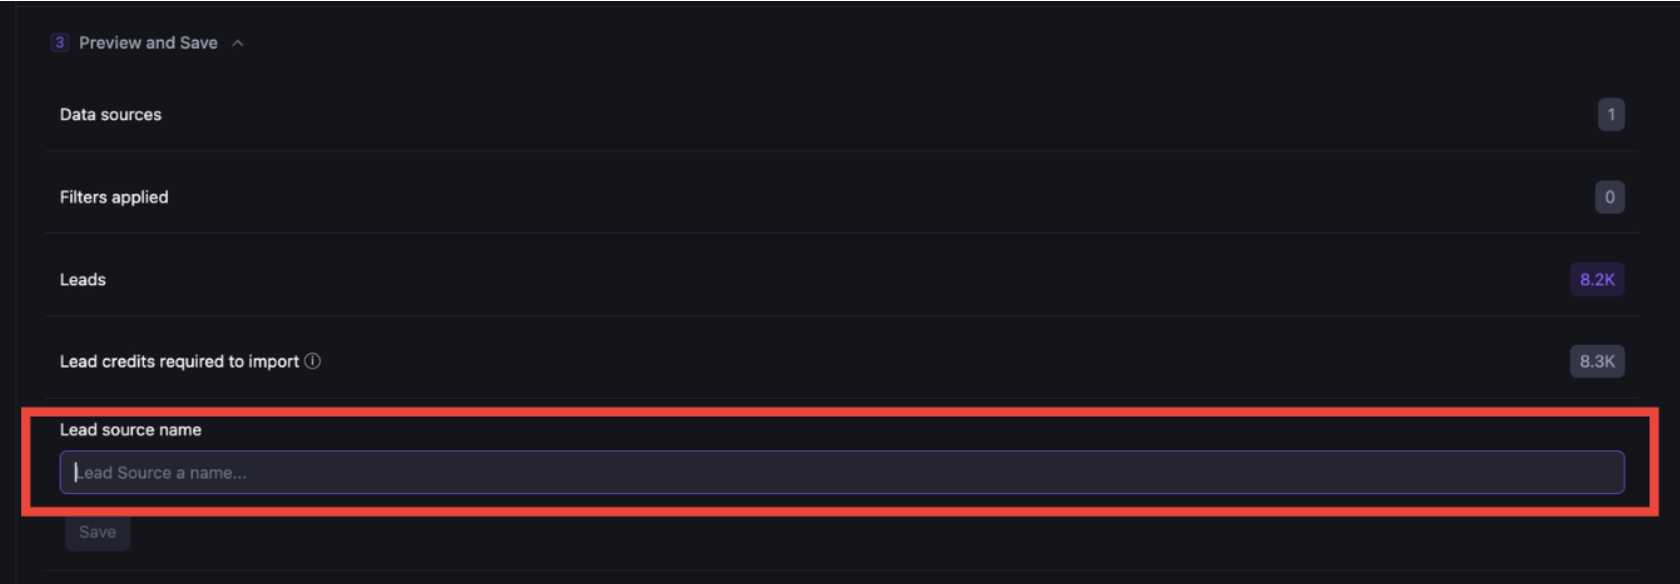
-
Hit Save

-
Go to the automations tab:
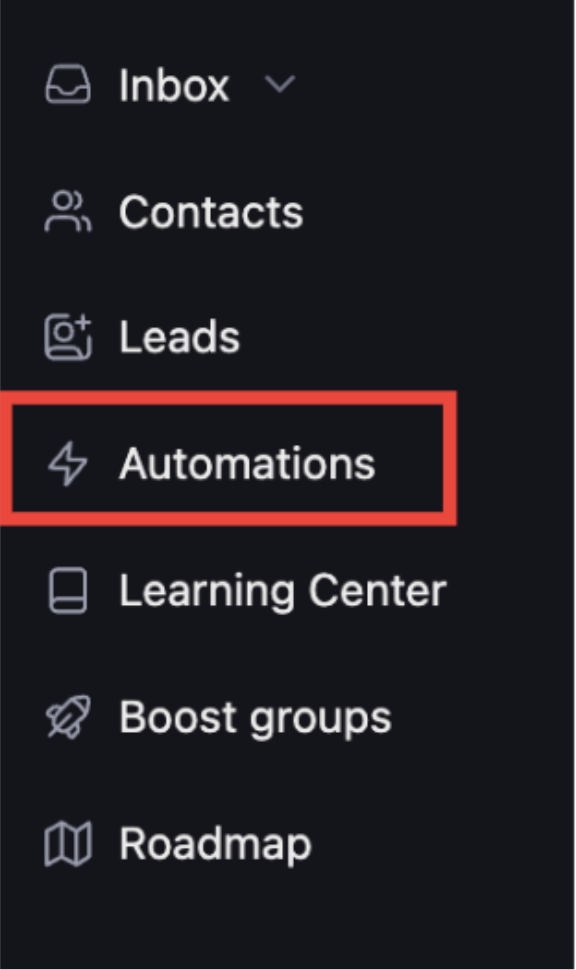
-
Hit add new
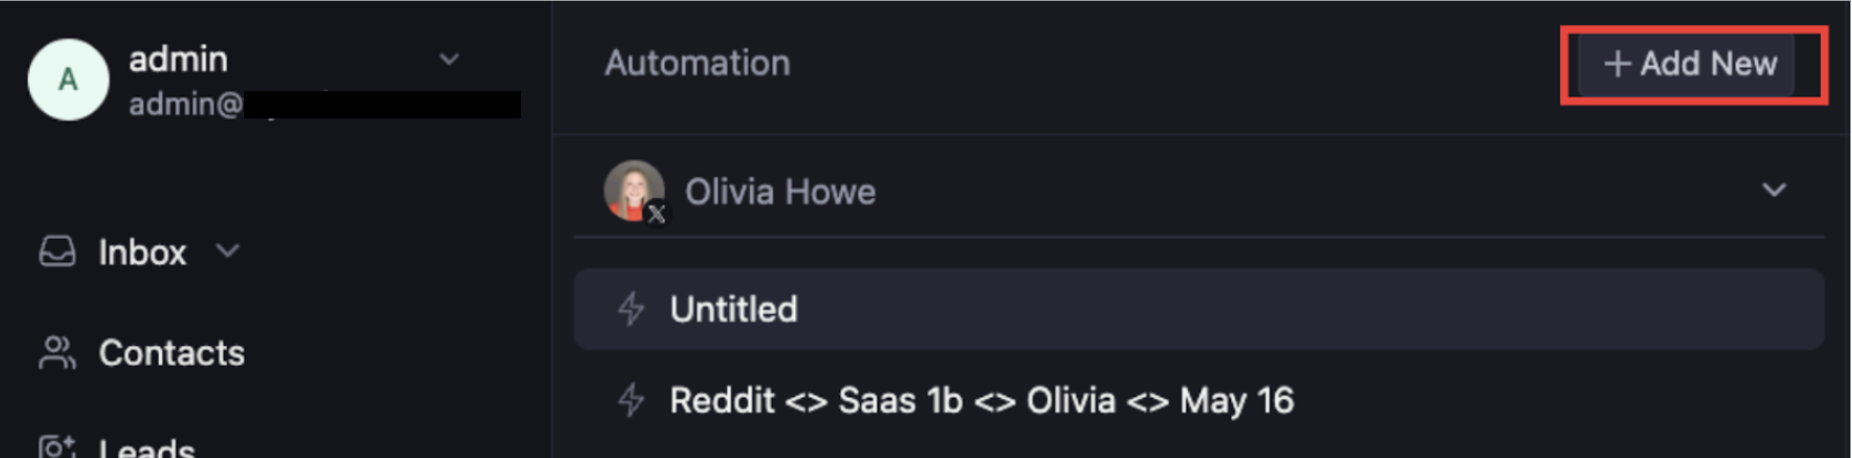
-
Select Cold DM 2.0 then hit Next
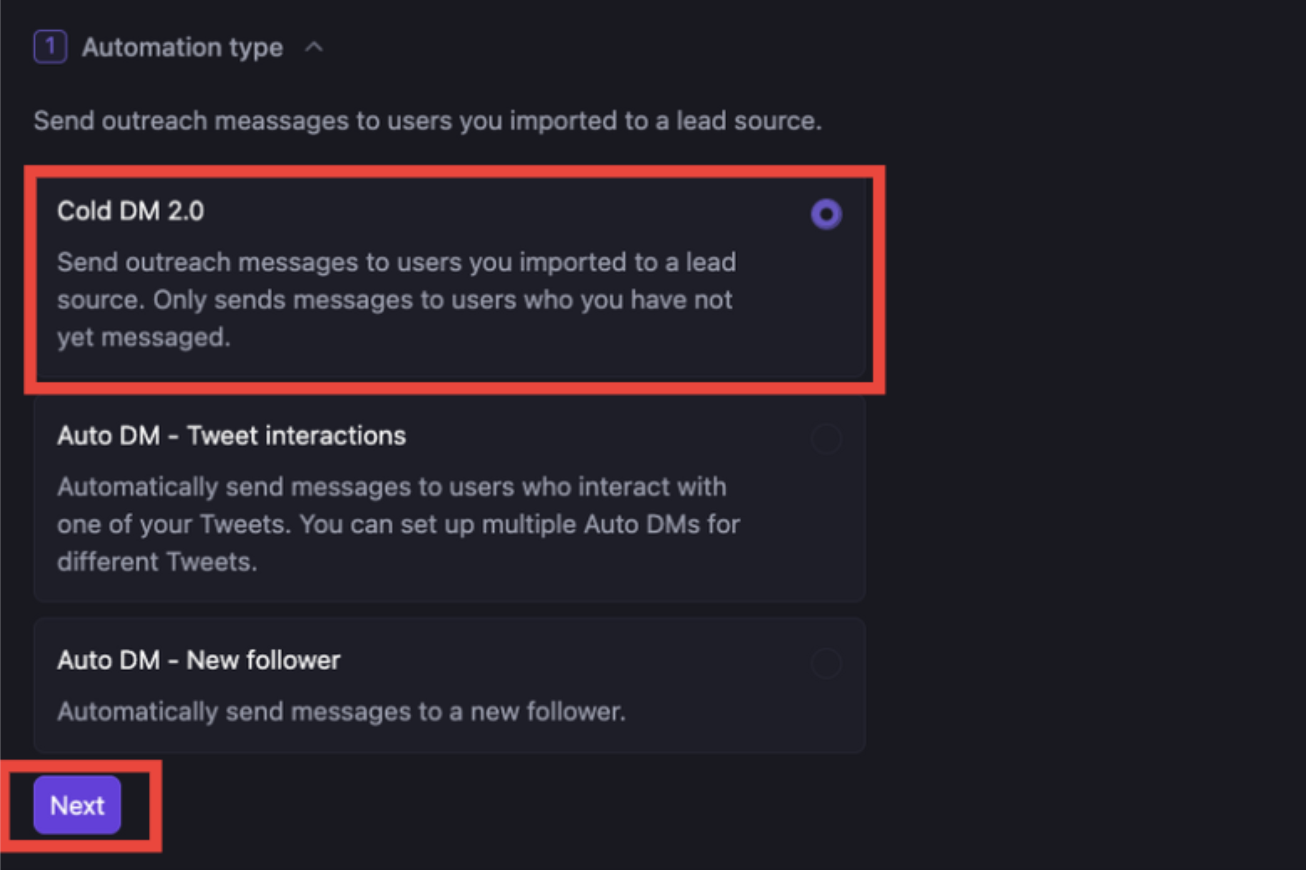
-
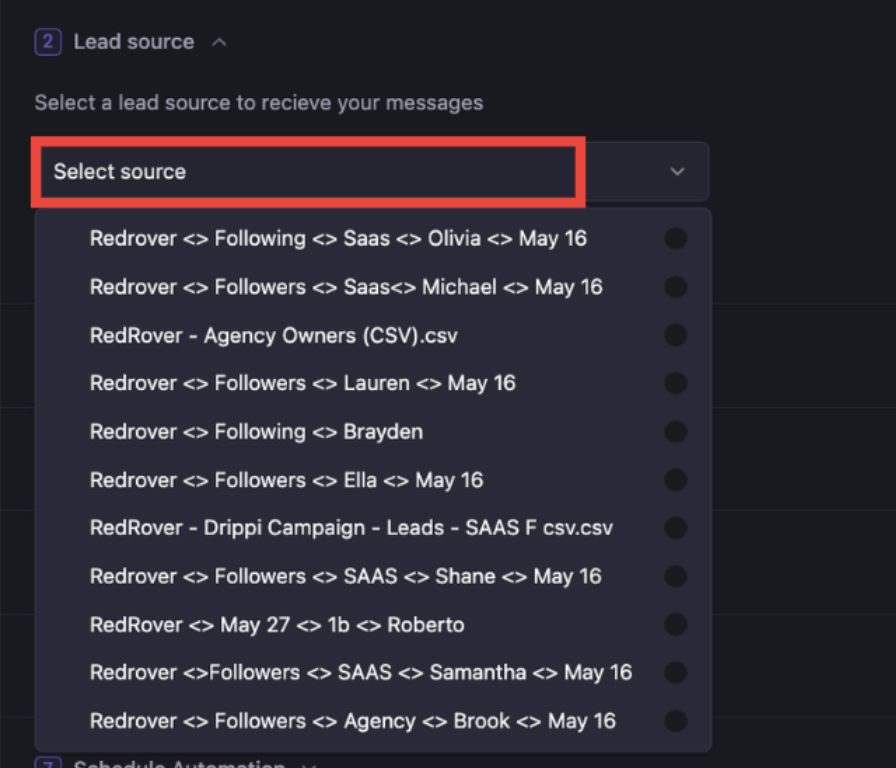
Hit select lead source and select the one you just made and hit next
-
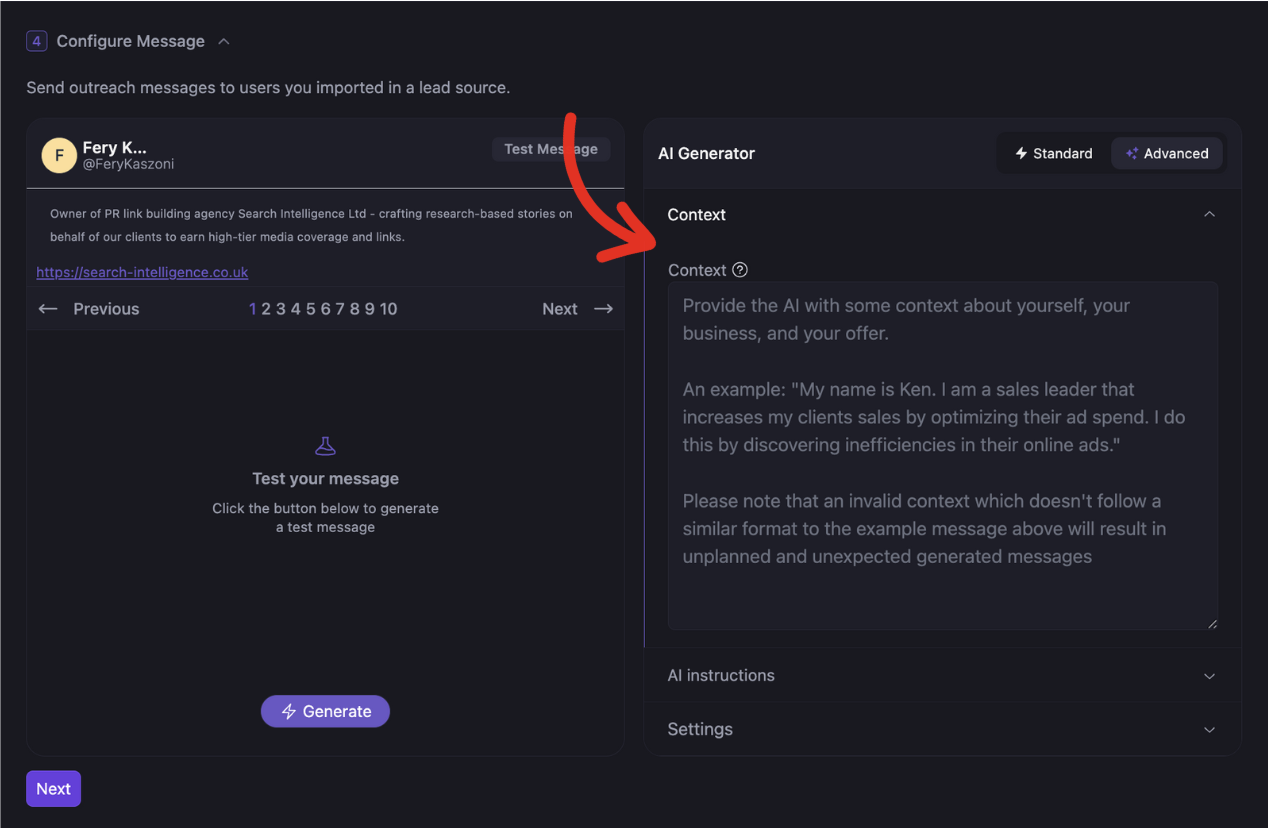
Select Script Personalizer and hit next

-
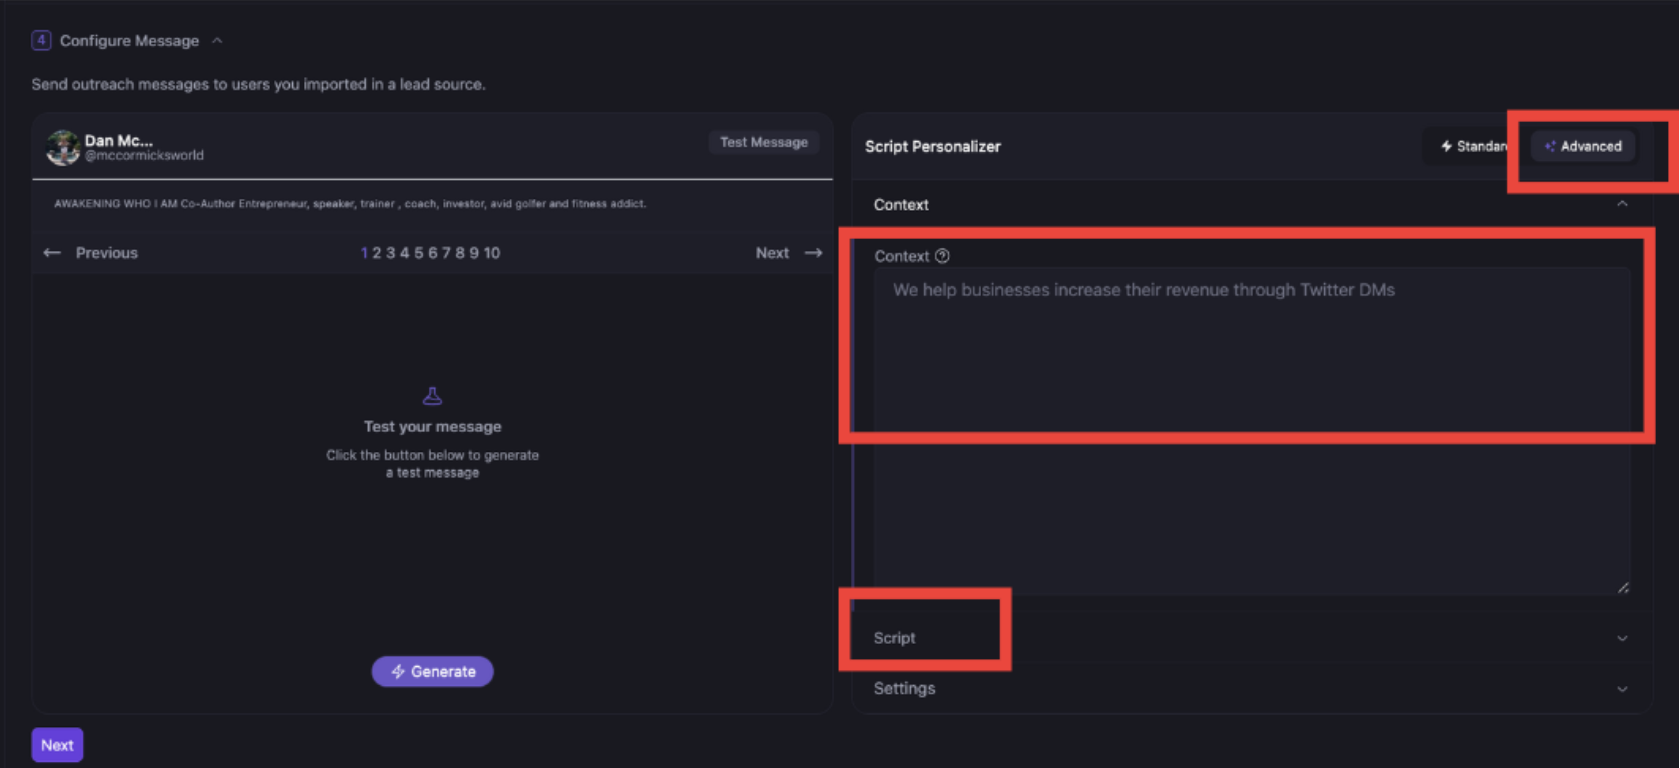
Select Advanced, Add Context, and then hit Script
-
Add the corresponding script, make sure the variables are the correct ones, and hit settings

-
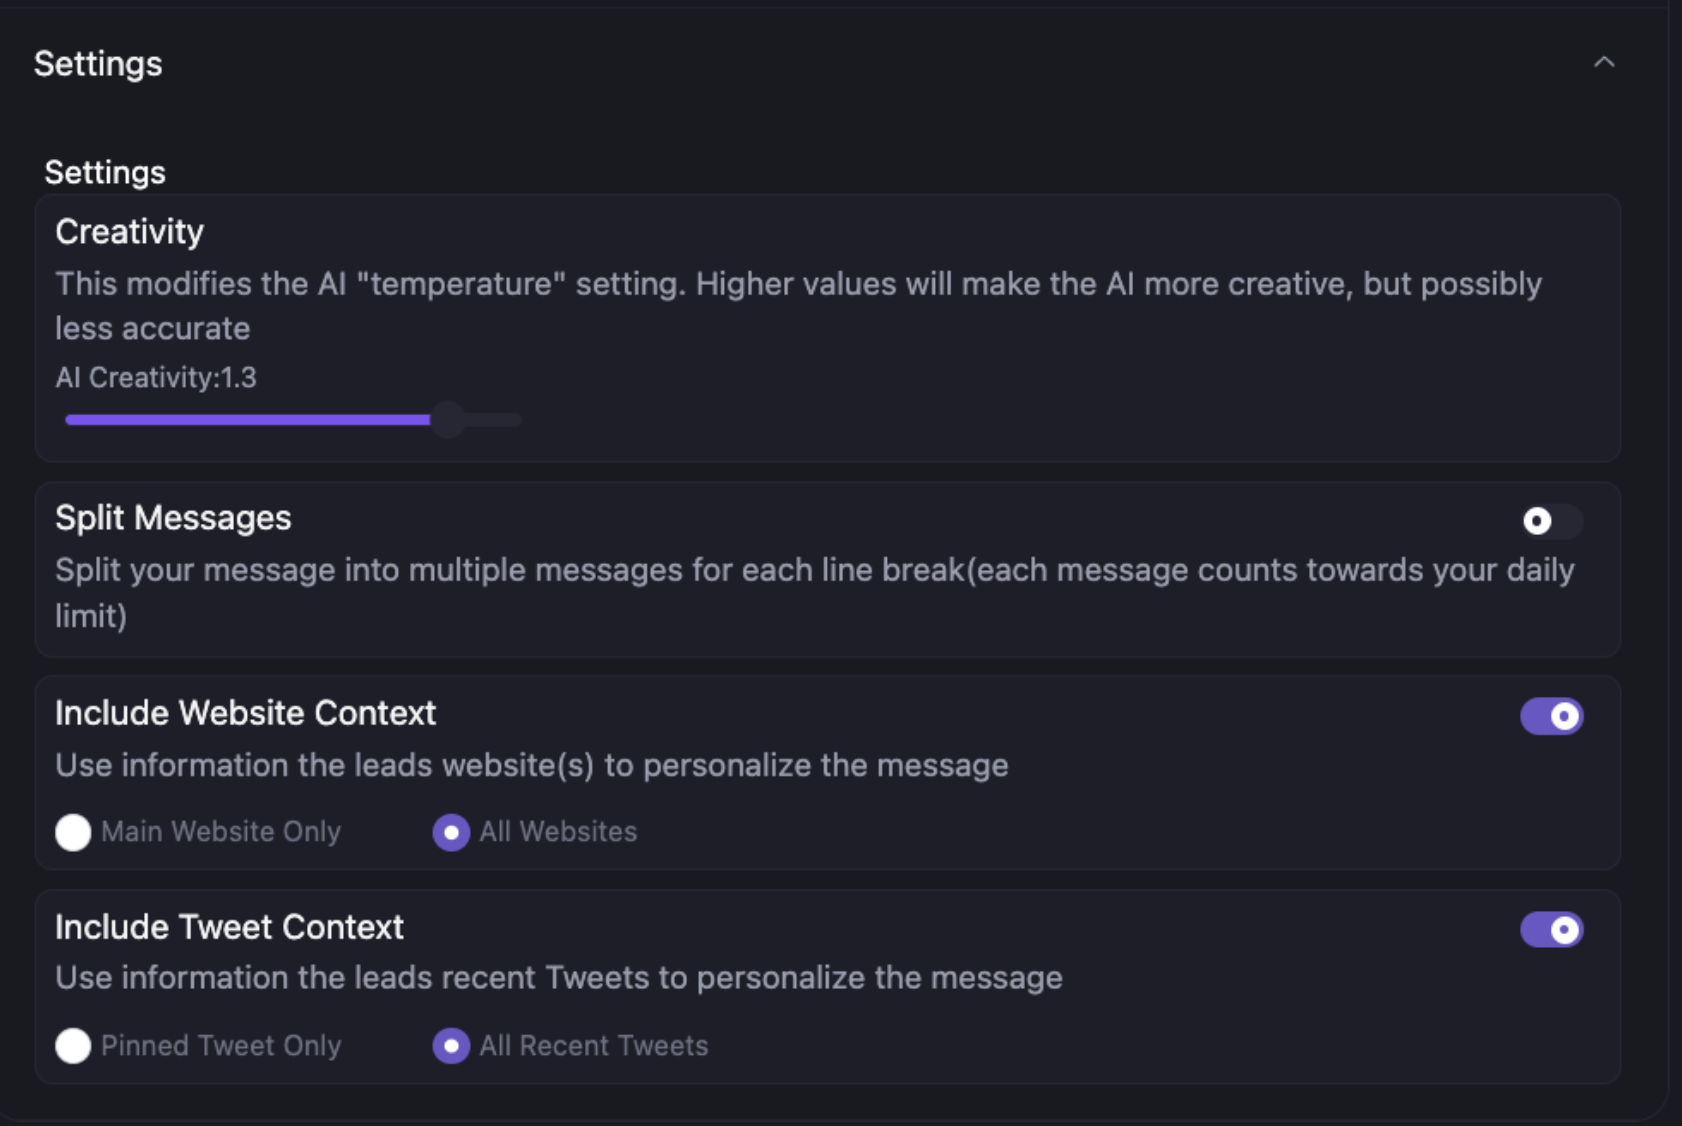
Make sure you set the settings just like below. If you have questions about the Split Messages toggle, please reach out to us at support@drippi.ai
-
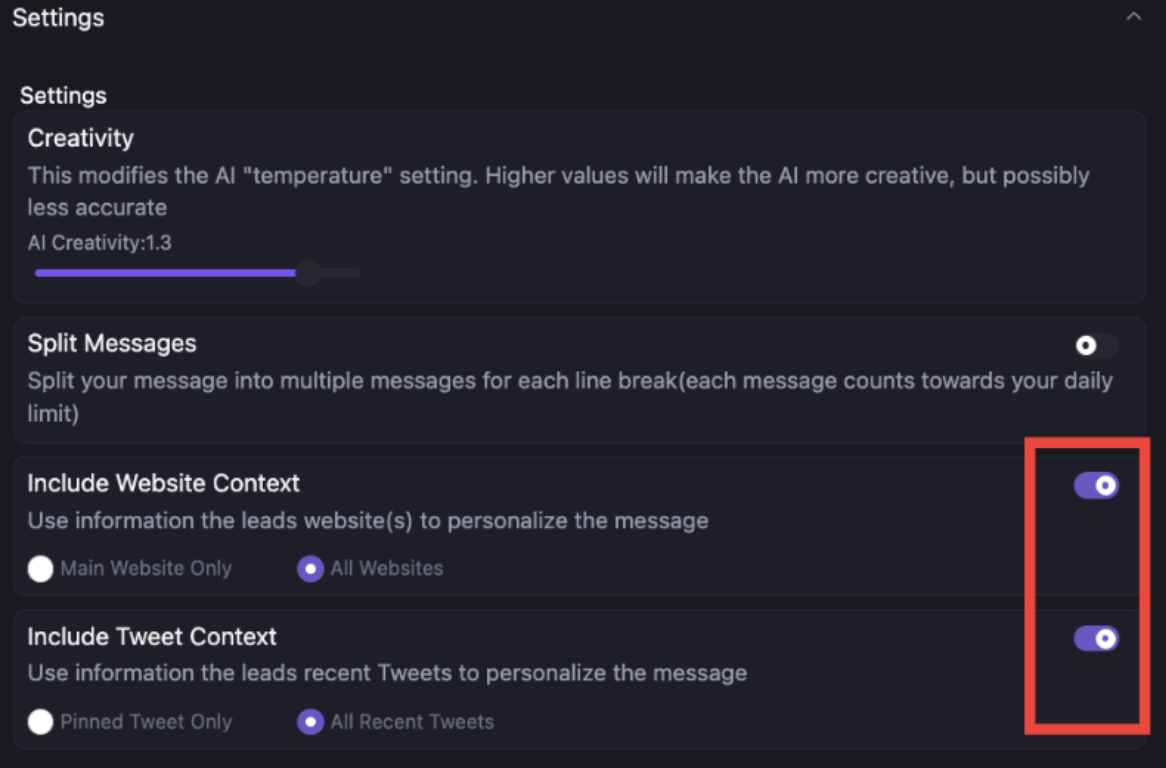
Make sure these are turned on as well, and hit next on the left
- Hit Next on variables (or add any variable you’d like)
-
Hit add followup
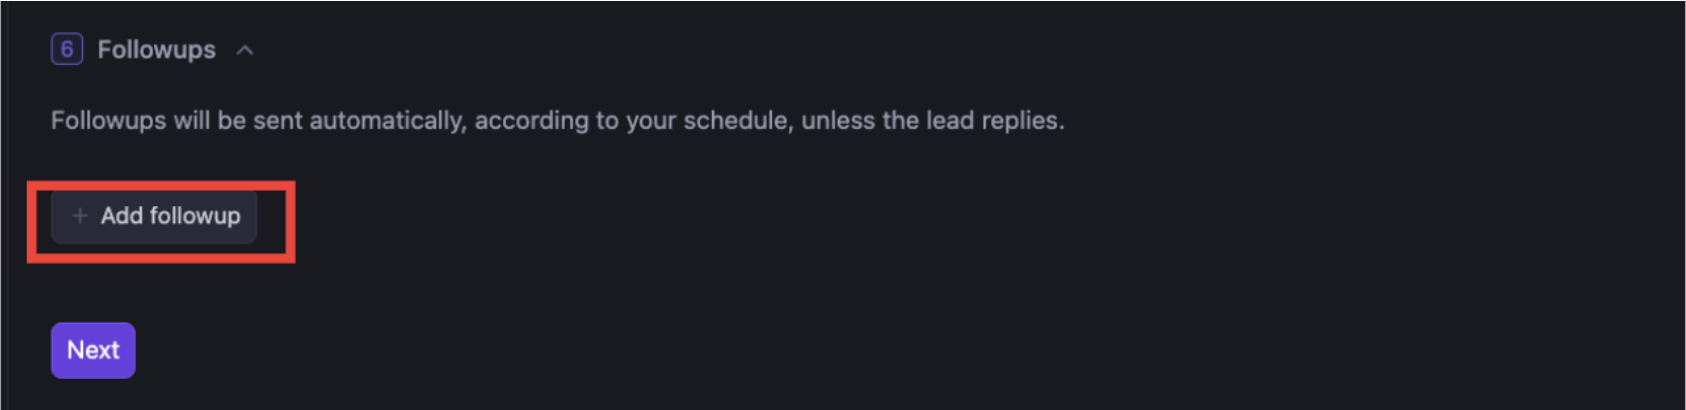
-
Select the cadence below and add the follow up scripts from the google doc and hit NEXT
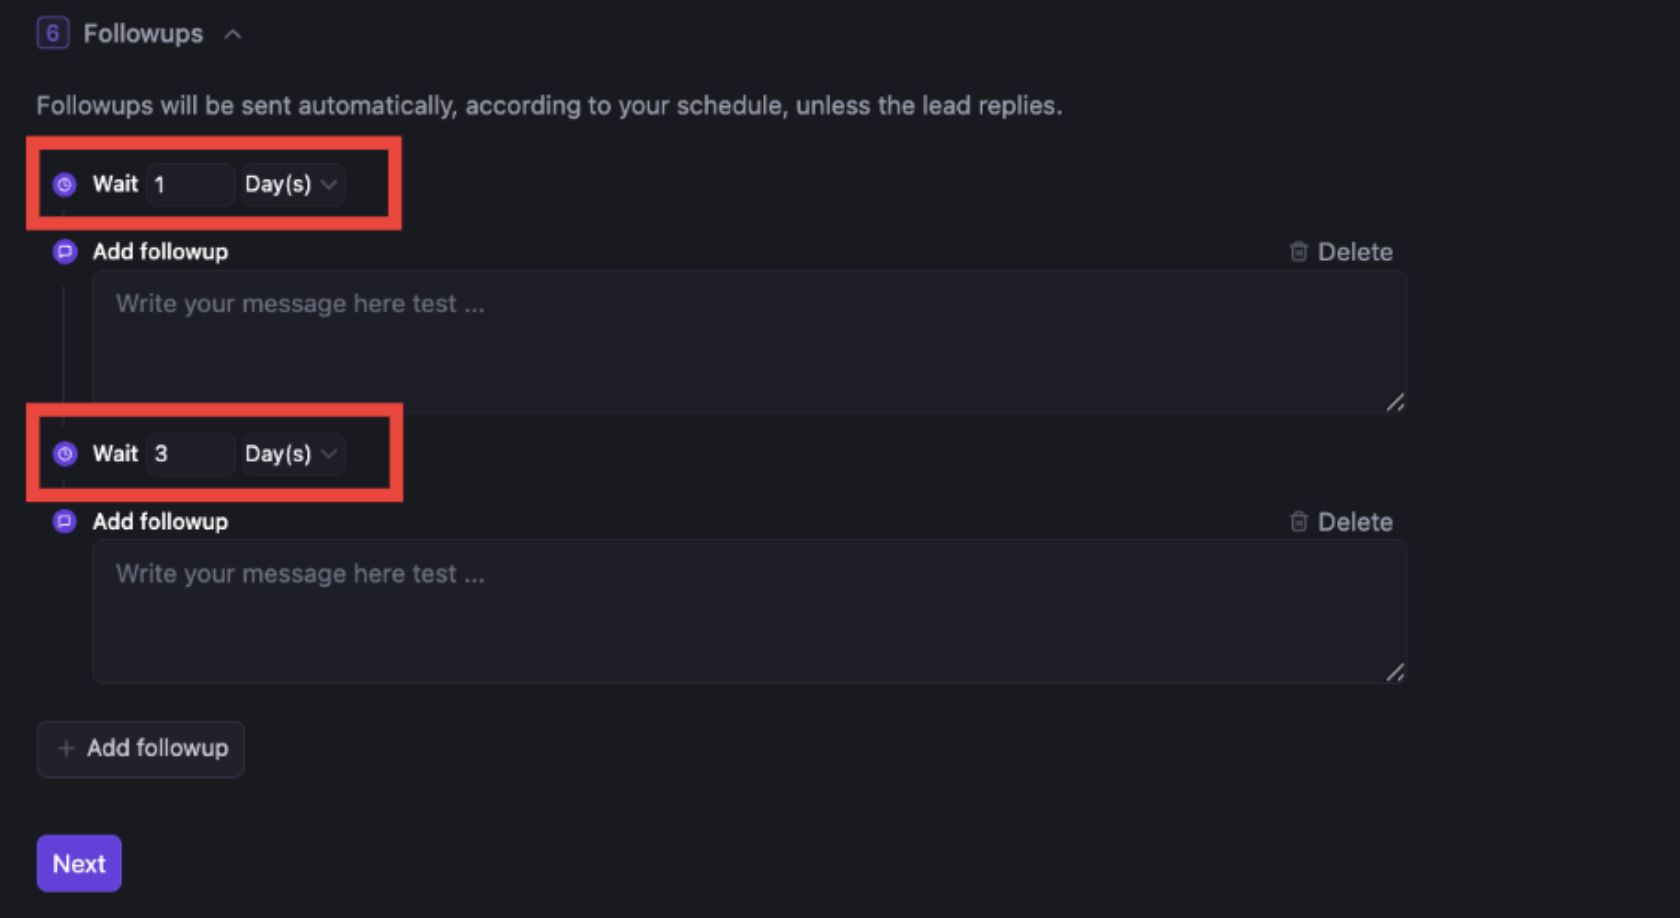
-
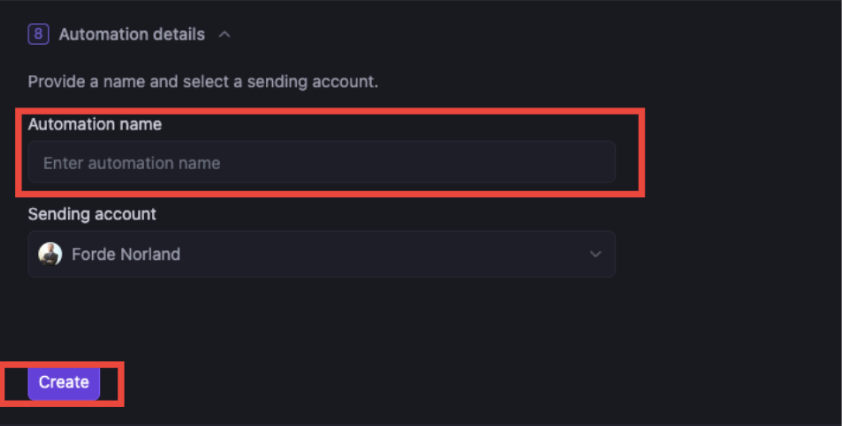
Hit advanced settings and make sure these settings are set up:
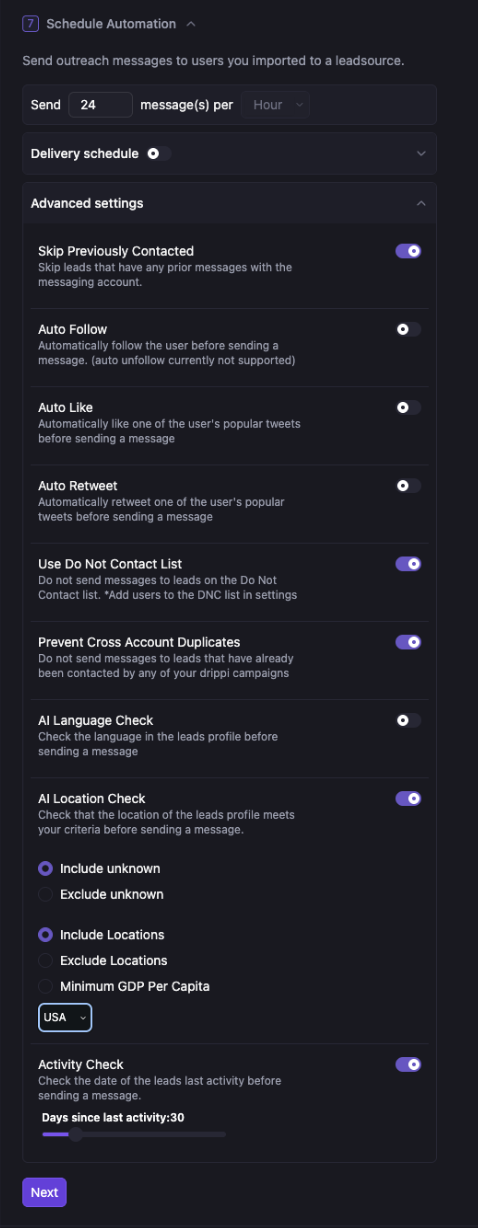
- Give the automation a name, following convention below, select the account, and hit create